
In our second Back to Basics post, we’ll walk through the process of scaling your environment from one Graylog server to a Graylog cluster. This will be useful for those who have followed our single server setup guide and are now noticing an increase in incoming data and need additional servers. For those that are new Graylog users, this guide will also help with your initial setup of a Graylog cluster. In addition, we’ll point out useful tips along the way.
EXTENDING CURRENT SETUP
Before adding another server, you might try to get the max out of your current resources. Start by raising the java heap size of Elasticsearch and the java heap size of Graylog. This will allow the Java Process to use more of the available resources.
There are additional settings that can also be tuned. By setting refresh_interval to 30 seconds in your Elasticsearch configuration, you can increase your Elasticsearch performance by up to 70%. Next, in your Graylog `server.conf`, you can increase output_batch_size and adjust outputbuffer_processors to allow larger batches to be sent over fewer processors. The settings for output batch size and output buffer processors will vary depending on your environment. For our environment, we set output_batch_size to 5000 and outputbuffer_processors to 3 with a 31 GB heap memory for the Elasticsearch node.
ADDING ELASTICSEARCH NODES
For adding to Elasticsearch, you will only need to adjust elasticsearch_discovery_zen_ping_unicast_hosts and elasticsearch_network_host in your Graylog `server.conf`. The first should be set to the IP address of your Elasticsearch node and the last to the IP of your Graylog node that can be reached by the Elasticsearch node.
The most important setting in your Elasticsearch configuration is to set network.host to your network IP address so that it can be reached from your Graylog node. This should be the same as set in your `server.conf` as elasticsearch_discovery_zen_ping_unicast_hosts IP address.
To increase the performance, availability, and storage of your Elasticsearch cluster, you will add additional nodes to your Elasticsearch setup. To do this, first make sure all Elasticsearch nodes use the same cluster.name. Then check that each node can reach the configured network.host of all other nodes and that you have most of them in your discovery.zen.ping.unicast.hosts configured in the elasticsearch.yml on all nodes.
In other words, you need to be able to reach your Graylog node on the configured elasticsearch_network_host address from and to any Elasticsearch node in the Cluster. The same goes for the Elasticsearch Ccluster. You will need most to all Elasticsearch nodes in your elasticsearch_discovery_zen_ping_unicast_hosts set in the Graylog `server.conf`.
GROWING YOUR GRAYLOG CLUSTER
When you start planing a bigger production setup containing a cluster for Elasticsearch and multiple Graylog nodes, first check our notes about multi-node setups in the documentation.
As nearly all configuration of your Graylog setup is stored in MongoDB, make sure it is reachable for every new Graylog node you add to the setup. If you will be adding just one Graylog node, you can move to the next step. If you are adding more than one node or want high-availability (HA) for MongoDB, please take a look at our FAQ on scaling MongoDB.
The new Graylog node will be installed following the steps outlined in the documentation. Note that you only need Graylog, not Elasticsearch or MongoDB, on the Server. For easy configuration, just copy the Graylog `server.conf` from the already running Graylog Server to this new one. Then replace the IP address or hostname on the new node in any location that is found in the configuration file. Typically this means that you replace rest_listen_uri, web_listen_uri and elasticsearch_network_host. Most importantly, set is_master to false as the Graylog cluster will not elect the master automatically.
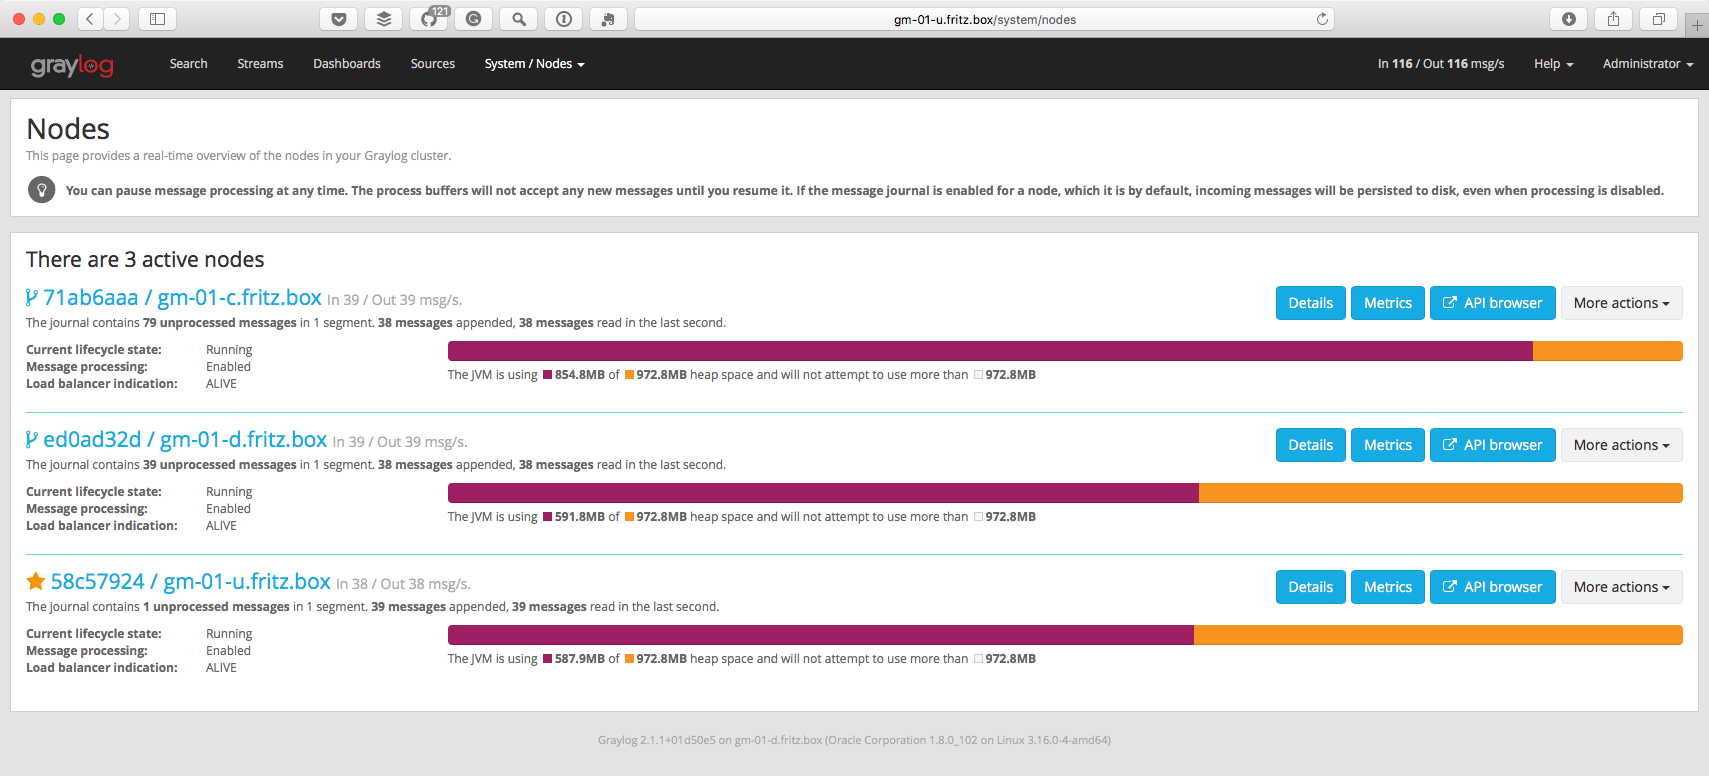
If you now start the new Graylog node and navigate in your Graylog web interface to ‘System / Nodes’, you will see that it has been added to your cluster. Global inputs will also start on the newly added nodes automatically and will be ready to receive messages. With multiple Graylog nodes, all data can be shared among servers and all global inputs are present on all nodes in the cluster. The only difference between Graylog nodes is that one will set is_master to true which will take care of any maintenance. This includes handling the guidance where incoming messages are stored, sending the configured alarms, and writing the archive to disk. In addition, you can use the web interface on any of the running Graylog servers.
Now it is up to your setup and needs on how you proceed. You can add load-balancing to the web interface or disable the web interface on the new Graylog nodes. You can also use a load-balancer for your inputs or do manual routing to the different servers.
Your journey with multiple Graylog servers has just begun! Our next Back to Basics post will be focused on obtaining and analyzing your Graylog metrics. We would love to hear your logging story in the comments section below. Please be sure to follow us on Twitter and sign up for our newsletter to be alerted of the next release!
Happy Logging!
